
Fragment adalah komponen UI yang dapat digunakan kembali dalam aplikasi Android. Mereka memungkinkan kita untuk membagi tampilan aplikasi menjadi beberapa bagian yang dapat dikelola secara independen. Dalam tutorial ini, kita akan membuat aplikasi pendataan penduduk sederhana menggunakan Fragment untuk mengelola tampilan daftar penduduk, detail penduduk, dan form input data baru.
1. Buat proyek Android baru dengan nama "Penduduk". Pastikan untuk memilih minimum SDK yang sesuai yaitu API. 17 (Android 4.2 : Jelly Bean )
2. Tambahkan dependensi berikut di file build.gradle (Module: app):
implementation 'androidx.recyclerview:recyclerview:1.2.1'3. Buat Layout Main Activity pada file activity_main.xml<?xml version="1.0" encoding="utf-8"?>
<FrameLayout xmlns:android="http://schemas.android.com/apk/res/android"
android:id="@+id/fragment_container"
android:layout_width="match_parent"
android:layout_height="match_parent" />4. Tambahkan Code Pada MainActivitypackage com.example.penduduk;
import androidx.appcompat.app.AppCompatActivity;
import android.os.Bundle;
import java.util.ArrayList;
import java.util.List;
public class MainActivity extends AppCompatActivity implements InputFragment.OnDataInputListener {
private List<Penduduk> pendudukList = new ArrayList<>();
@Override
protected void onCreate(Bundle savedInstanceState) {
super.onCreate(savedInstanceState);
setContentView(R.layout.activity_main);
if (savedInstanceState == null) {
getSupportFragmentManager().beginTransaction()
.add(R.id.fragment_container, new InputFragment())
.commit();
}
}
@Override
public void onDataInput(String nik, String nama, String alamat) {
Penduduk newPenduduk = new Penduduk(nik, nama, alamat);
pendudukList.add(newPenduduk);
// Setelah menambahkan data, kembali ke InputFragment
getSupportFragmentManager().beginTransaction()
.replace(R.id.fragment_container, new InputFragment())
.commit();
}
public List<Penduduk> getPendudukList() {
return pendudukList;
}
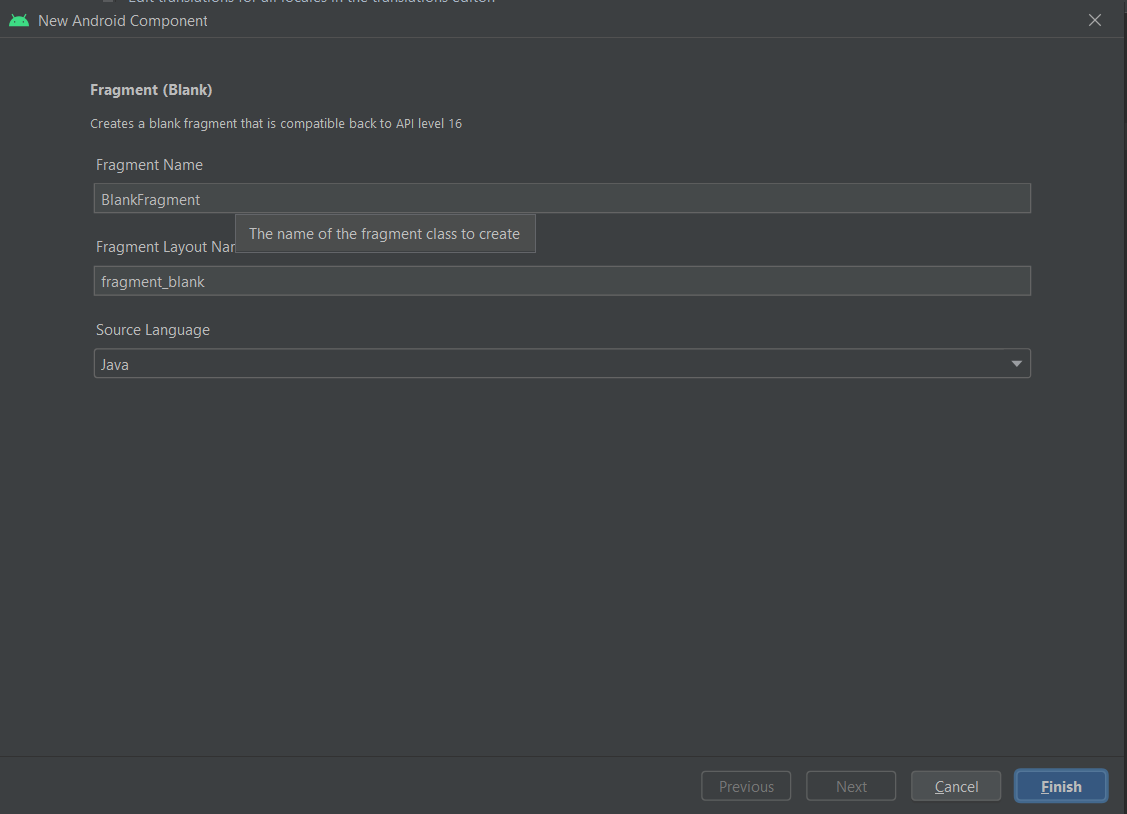
}5. Buat FragmentBuat 3 fragment dengan nama :- InputFragment.java dan fragment_input.xml untuk layoutnya- DetailFragment.java dan fragment_detail.xml untuk layoutnya- ListFragment.java dan fragment_list.xml untuk layoutnyauntuk membuat fragment, klik kanan pada folder com.example.namaaplikasi lalu pilih new lalu klik opsi fragment
6. Tambahkan Kode Berikut Pada InputFragment.javapackage com.example.penduduk;
import static androidx.core.content.ContextCompat.getSystemService;
import android.app.Notification;
import android.app.NotificationManager;
import android.app.PendingIntent;
import android.content.Context;
import android.content.Intent;
import android.os.Bundle;
import android.view.LayoutInflater;
import android.view.View;
import android.view.ViewGroup;
import android.widget.Button;
import android.widget.EditText;
import androidx.annotation.NonNull;
import androidx.core.app.NotificationCompat;
import androidx.fragment.app.Fragment;
public class InputFragment extends Fragment {
private EditText editNik, editNama, editAlamat;
private OnDataInputListener mListener;
public interface OnDataInputListener {
void onDataInput(String nik, String nama, String alamat);
}
@Override
public View onCreateView(LayoutInflater inflater, ViewGroup container,
Bundle savedInstanceState) {
View view = inflater.inflate(R.layout.fragment_input, container, false);
editNik = view.findViewById(R.id.edit_nik);
editNama = view.findViewById(R.id.edit_nama);
editAlamat = view.findViewById(R.id.edit_alamat);
Button btnSubmit = view.findViewById(R.id.btn_submit);
Button btnLihatDaftar = view.findViewById(R.id.btn_lihat_daftar);
btnSubmit.setOnClickListener(new View.OnClickListener() {
@Override
public void onClick(View v) {
String nik = editNik.getText().toString();
String nama = editNama.getText().toString();
String alamat = editAlamat.getText().toString();
mListener.onDataInput(nik, nama, alamat);
// Clear input fields after submission
editNik.setText("");
editNama. setText("");
editAlamat.setText("");
}
});
btnLihatDaftar.setOnClickListener(new View.OnClickListener() {
@Override
public void onClick(View v) {
ListFragment listFragment = new ListFragment();
getParentFragmentManager().beginTransaction()
.replace(R.id.fragment_container, listFragment)
.addToBackStack(null)
.commit();
}
});
return view;
}
@Override
public void onAttach(@NonNull Context context) {
super.onAttach(context);
if (context instanceof OnDataInputListener) {
mListener = (OnDataInputListener) context;
} else {
throw new RuntimeException(context.toString()
+ " must implement OnDataInputListener");
}
}
}7. Tambahkan Kode Berikut Pada fragment_input.xml<?xml version="1.0" encoding="utf-8"?>
<ScrollView xmlns:android="http://schemas.android.com/apk/res/android"
xmlns:app="http://schemas.android.com/apk/res-auto"
android:layout_width="match_parent"
android:layout_height="match_parent"
android:background="@color/background_color">
<LinearLayout
android:layout_width="match_parent"
android:layout_height="wrap_content"
android:orientation="vertical"
android:padding="24dp">
<TextView
android:layout_width="wrap_content"
android:layout_height="wrap_content"
android:layout_gravity="center_horizontal"
android:text="Form Pendaftaran"
android:textSize="24sp"
android:textStyle="bold"
android:textColor="@color/primary_color"
android:layout_marginBottom="24dp"/>
<com.google.android.material.card.MaterialCardView
android:layout_width="match_parent"
android:layout_height="wrap_content"
app:cardCornerRadius="12dp"
app:cardElevation="4dp"
android:layout_marginBottom="24dp">
<LinearLayout
android:layout_width="match_parent"
android:layout_height="wrap_content"
android:orientation="vertical"
android:padding="16dp">
<com.google.android.material.textfield.TextInputLayout
android:layout_width="match_parent"
android:layout_height="wrap_content"
android:layout_marginBottom="16dp"
style="@style/Widget.MaterialComponents.TextInputLayout.OutlinedBox">
<com.google.android.material.textfield.TextInputEditText
android:id="@+id/edit_nik"
android:layout_width="match_parent"
android:layout_height="wrap_content"
android:hint="NIK"
android:inputType="number" />
</com.google.android.material.textfield.TextInputLayout>
<com.google.android.material.textfield.TextInputLayout
android:layout_width="match_parent"
android:layout_height="wrap_content"
android:layout_marginBottom="16dp"
style="@style/Widget.MaterialComponents.TextInputLayout.OutlinedBox">
<com.google.android.material.textfield.TextInputEditText
android:id="@+id/edit_nama"
android:layout_width="match_parent"
android:layout_height="wrap_content"
android:hint="Nama"
android:inputType="textPersonName" />
</com.google.android.material.textfield.TextInputLayout>
<com.google.android.material.textfield.TextInputLayout
android:layout_width="match_parent"
android:layout_height="wrap_content"
style="@style/Widget.MaterialComponents.TextInputLayout.OutlinedBox">
<com.google.android.material.textfield.TextInputEditText
android:id="@+id/edit_alamat"
android:layout_width="match_parent"
android:layout_height="wrap_content"
android:hint="Alamat"
android:inputType="textMultiLine"
android:minLines="2" />
</com.google.android.material.textfield.TextInputLayout>
</LinearLayout>
</com.google.android.material.card.MaterialCardView>
<com.google.android.material.button.MaterialButton
android:id="@+id/btn_submit"
android:layout_width="match_parent"
android:layout_height="wrap_content"
android:layout_marginBottom="16dp"
android:text="Submit"
android:textAllCaps="false"
app:cornerRadius="8dp" />
<com.google.android.material.button.MaterialButton
android:id="@+id/btn_lihat_daftar"
android:layout_width="match_parent"
android:layout_height="wrap_content"
android:text="Lihat Daftar"
android:textAllCaps="false"
app:cornerRadius="8dp"
style="@style/Widget.MaterialComponents.Button.OutlinedButton" />
</LinearLayout>
</ScrollView>8. Tambahkan kode berikut pada DetailFragment.javapackage com.example.penduduk;
import android.os.Bundle;
import android.view.LayoutInflater;
import android.view.View;
import android.view.ViewGroup;
import android.widget.TextView;
import androidx.fragment.app.Fragment;
import com.google.android.material.button.MaterialButton;
public class DetailFragment extends Fragment {
private TextView textNik, textNama, textAlamat;
@Override
public View onCreateView(LayoutInflater inflater, ViewGroup container,
Bundle savedInstanceState) {
View view = inflater.inflate(R.layout.fragment_detail, container, false);
MaterialButton backButton = view.findViewById(R.id.btn_kembali);
textNik = view.findViewById(R.id.text_detail_nik);
textNama = view.findViewById(R.id.text_detail_nama);
textAlamat = view.findViewById(R.id.text_detail_alamat);
backButton.setOnClickListener(v -> {
// Pindah ke ListFragment
getActivity().getSupportFragmentManager().beginTransaction()
.replace(R.id.fragment_container, new ListFragment())
.addToBackStack(null)
.commit();
});
Bundle args = getArguments();
if (args != null) {
String nik = args.getString("nik", "");
String nama = args.getString("nama", "");
String alamat = args.getString("alamat", "");
textNik.setText("NIK: " + nik);
textNama.setText("Nama: " + nama);
textAlamat.setText("Alamat: " + alamat);
}
return view;
}
}9. Tambahan kode berikut pada fragment_detail.xml<?xml version="1.0" encoding="utf-8"?>
<ScrollView xmlns:android="http://schemas.android.com/apk/res/android"
xmlns:app="http://schemas.android.com/apk/res-auto"
android:layout_width="match_parent"
android:layout_height="match_parent"
android:background="@color/background_color">
<LinearLayout
android:layout_width="match_parent"
android:layout_height="wrap_content"
android:orientation="vertical"
android:padding="16dp">
<TextView
android:layout_width="wrap_content"
android:layout_height="wrap_content"
android:text="Detail Penduduk"
android:textSize="24sp"
android:textStyle="bold"
android:textColor="@color/primary_color"
android:layout_marginBottom="24dp"/>
<com.google.android.material.card.MaterialCardView
android:layout_width="match_parent"
android:layout_height="wrap_content"
app:cardCornerRadius="12dp"
app:cardElevation="4dp"
android:layout_marginBottom="16dp">
<LinearLayout
android:layout_width="match_parent"
android:layout_height="wrap_content"
android:orientation="vertical"
android:padding="16dp">
<TextView
android:layout_width="wrap_content"
android:layout_height="wrap_content"
android:text="NIK"
android:textSize="14sp"
android:textColor="@color/secondary_text_color"
android:layout_marginBottom="4dp"/>
<TextView
android:id="@+id/text_detail_nik"
android:layout_width="wrap_content"
android:layout_height="wrap_content"
android:textSize="18sp"
android:textColor="@color/primary_text_color"
android:layout_marginBottom="16dp"/>
<TextView
android:layout_width="wrap_content"
android:layout_height="wrap_content"
android:text="Nama"
android:textSize="14sp"
android:textColor="@color/secondary_text_color"
android:layout_marginBottom="4dp"/>
<TextView
android:id="@+id/text_detail_nama"
android:layout_width="wrap_content"
android:layout_height="wrap_content"
android:textSize="18sp"
android:textColor="@color/primary_text_color"
android:layout_marginBottom="16dp"/>
<TextView
android:layout_width="wrap_content"
android:layout_height="wrap_content"
android:text="Alamat"
android:textSize="14sp"
android:textColor="@color/secondary_text_color"
android:layout_marginBottom="4dp"/>
<TextView
android:id="@+id/text_detail_alamat"
android:layout_width="wrap_content"
android:layout_height="wrap_content"
android:textSize="18sp"
android:textColor="@color/primary_text_color"/>
</LinearLayout>
</com.google.android.material.card.MaterialCardView>
<com.google.android.material.button.MaterialButton
android:id="@+id/btn_kembali"
android:layout_width="match_parent"
android:layout_height="wrap_content"
android:text="Kembali"
android:textAllCaps="false"
app:cornerRadius="8dp"
style="@style/Widget.MaterialComponents.Button.OutlinedButton"/>
</LinearLayout>
</ScrollView>10. Tambahkan kode berikut pada ListFragment.javapackage com.example.penduduk;
import android.os.Bundle;
import android.view.LayoutInflater;
import android.view.View;
import android.view.ViewGroup;
import androidx.fragment.app.Fragment;
import androidx.recyclerview.widget.LinearLayoutManager;
import androidx.recyclerview.widget.RecyclerView;
import java.util.List;
public class ListFragment extends Fragment implements PendudukAdapter.OnItemClickListener {
private RecyclerView recyclerView;
private PendudukAdapter adapter;
private List<Penduduk> pendudukList;
@Override
public View onCreateView(LayoutInflater inflater, ViewGroup container,
Bundle savedInstanceState) {
View view = inflater.inflate(R.layout.fragment_list, container, false);
recyclerView = view.findViewById(R.id.recycler_view);
recyclerView.setLayoutManager(new LinearLayoutManager(getContext()));
MainActivity activity = (MainActivity) getActivity();
pendudukList = activity.getPendudukList();
adapter = new PendudukAdapter(pendudukList, this);
recyclerView.setAdapter(adapter);
return view;
}
@Override
public void onItemClick(Penduduk penduduk) {
DetailFragment detailFragment = new DetailFragment();
Bundle args = new Bundle();
args.putString("nik", penduduk.getNik());
args.putString("nama", penduduk.getNama());
args.putString("alamat", penduduk.getAlamat());
detailFragment.setArguments(args);
getParentFragmentManager().beginTransaction()
.replace(R.id.fragment_container, detailFragment)
.addToBackStack(null)
.commit();
}
}11. Tambahkan kode berikut pada fragment_list.xml<?xml version="1.0" encoding="utf-8"?>
<androidx.coordinatorlayout.widget.CoordinatorLayout xmlns:android="http://schemas.android.com/apk/res/android"
xmlns:app="http://schemas.android.com/apk/res-auto"
android:layout_width="match_parent"
android:layout_height="match_parent"
android:background="@color/background_color">
<com.google.android.material.appbar.AppBarLayout
android:layout_width="match_parent"
android:layout_height="wrap_content">
<com.google.android.material.appbar.MaterialToolbar
android:id="@+id/toolbar"
android:layout_width="match_parent"
android:layout_height="?attr/actionBarSize"
android:background="?attr/colorPrimary"
app:title="Daftar Penduduk"
app:titleTextColor="@android:color/white"/>
</com.google.android.material.appbar.AppBarLayout>
<androidx.core.widget.NestedScrollView
android:layout_width="match_parent"
android:layout_height="match_parent"
app:layout_behavior="@string/appbar_scrolling_view_behavior">
<LinearLayout
android:layout_width="match_parent"
android:layout_height="wrap_content"
android:orientation="vertical"
android:padding="16dp">
<com.google.android.material.textfield.TextInputLayout
android:layout_width="match_parent"
android:layout_height="wrap_content"
android:layout_marginBottom="16dp"
app:startIconDrawable="@android:drawable/ic_menu_search"
style="@style/Widget.MaterialComponents.TextInputLayout.OutlinedBox">
<com.google.android.material.textfield.TextInputEditText
android:id="@+id/edit_search"
android:layout_width="match_parent"
android:layout_height="wrap_content"
android:hint="Cari penduduk"/>
</com.google.android.material.textfield.TextInputLayout>
<androidx.recyclerview.widget.RecyclerView
android:id="@+id/recycler_view"
android:layout_width="match_parent"
android:layout_height="wrap_content"
android:nestedScrollingEnabled="false"/>
</LinearLayout>
</androidx.core.widget.NestedScrollView>
<com.google.android.material.floatingactionbutton.FloatingActionButton
android:id="@+id/fab_add"
android:layout_width="wrap_content"
android:layout_height="wrap_content"
android:layout_gravity="bottom|end"
android:layout_margin="16dp"
android:src="@android:drawable/ic_input_add"
app:tint="@android:color/white"/>
</androidx.coordinatorlayout.widget.CoordinatorLayout>12. modifikasi file colors.xml pada folder res/values<?xml version="1.0" encoding="utf-8"?>
<resources>
<color name="primary_color">#1976D2</color>
<color name="background_color">#F5F5F5</color>
<color name="primary_text_color">#212121</color>
<color name="secondary_text_color">#757575</color>
<color name="purple_200">#FFBB86FC</color>
<color name="purple_500">#FF6200EE</color>
<color name="purple_700">#FF3700B3</color>
<color name="teal_200">#FF03DAC5</color>
<color name="teal_700">#FF018786</color>
<color name="black">#FF000000</color>
<color name="white">#FFFFFFFF</color>
</resources>setelah semua kode diatas di terapkan pada proyek aplikasi anda, anda dapat meng-installnyapada perangkat anda dengan run langsung pada Android Studio Atau Build APK(s)Berikut Tampilan Proses Pada Aplikasi Pendataan Penduduk Sederhana

Penggunaan Fragment dalam aplikasi pendataan penduduk ini memungkinkan kita untuk membuat UI yang lebih modular dan mudah dikelola. Dengan memisahkan logika tampilan ke dalam Fragment terpisah, kita dapat dengan mudah menambahkan fitur baru atau memodifikasi tampilan yang ada tanpa mempengaruhi komponen lain.
Untuk pengembangan lebih lanjut, Anda dapat menambahkan fitur seperti:
- Penyimpanan data lokal menggunakan Room Database
- Implementasi search dan filter pada daftar penduduk
- Penambahan fitur edit dan hapus data penduduk
dengan tutorial ini, Anda telah mempelajari dasar-dasar penggunaan Fragment dalam aplikasi Android dan bagaimana menerapkannya dalam konteks aplikasi pendataan penduduk.
Komentar
Posting Komentar